
Data Points and Wi-Fi in an HDB Flat, Singapore: Where the Network Points Go Before the Ceiling Closes
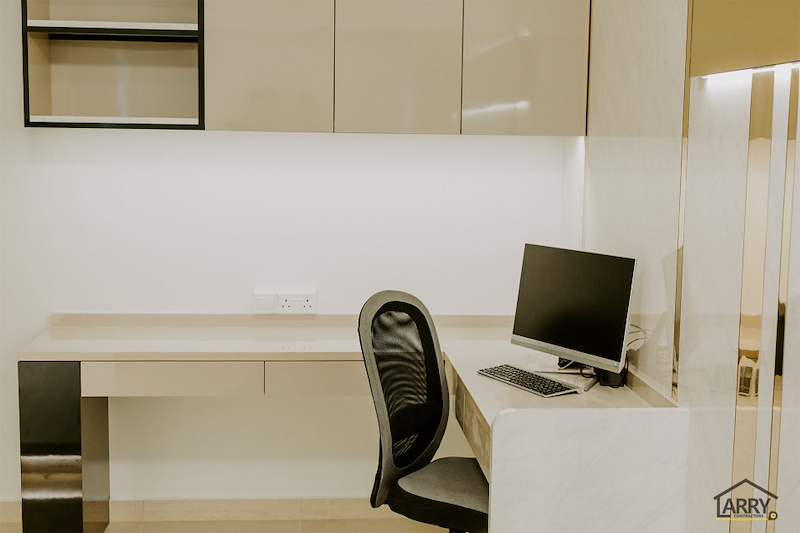
Pictured above: a built-in study desk from our project archive (C10). A double socket sits on the wall above the desktop, with a monitor on the desk and overhead cabinets in cream high-gloss laminate. A network point is placed the same way, before the wall is painted.
Most owners plan the sockets and forget the internet. The flat is rewired, the ceiling is closed, the carpentry is fitted, and only then does someone ask where the router will go. By then the line to the router has to run along the skirting or across a doorway, the TV console has no cable to the wall, and the desk in the far bedroom is two walls away from the only signal in the flat. None of it is hard to fix before the walls close. All of it is annoying after.
This guide is for an HDB owner who is about to renovate and wants the internet to work in the rooms that matter. It uses only what this site already publishes: the data point and power point rates on our room cost calculator and the 4-room programme. It gives no price for an internet plan or a router, because we do not sell either.
The short answer
- Decide where the router lives before the electrician starts. In the published 4-room programme, electrical work is weeks 2 to 3. After that the wall is closed over.
- Put a wired data point where a cable does the job better than Wi-Fi: behind the TV, at the desk you work at, and wherever a computer or a TV box stays put.
- Do not assume the internet comes in where you want the router. Find where your provider's line enters the flat today, then decide whether the router stays there or a cable carries the signal to a better spot.
- Ask for the data points by name on the quotation. On our room cost calculator a data point is its own line at $120 each, against $90 for a power point. If the quotation only says "electrical points", ask how many of those are data points.
- Leave a way to change your mind. A point placed in a wall you can open later is cheap. A point sealed behind a finished feature wall is not.
Why the network is decided in week 2, not week 8
On our published 4-room programme, hacking is week 1, masonry, plumbing and electrical work are weeks 2 to 3, and waterproofing, tiling and the false ceiling are weeks 4 to 5. Carpentry installation is weeks 6 to 7, and painting, doors, hardware and handover are week 8. That is the programme for a full renovation of a 4-room flat; your own timing depends on your scope.
Cables for data are laid at the same stage as the electrical wiring, because they run in the same conduits and the same walls. If you decide where the router goes in week 8, you are choosing a spot that the wiring from week 2 never planned for. Choose it at the site visit, put it on the same drawing as the sockets, and the electrician places it once.
Step one: find out where the signal comes in today
Before you plan anything, look at where your current flat gets its internet. Check the wall near the main door, the living room, and any room where a box or a small socket is fixed to the wall. The line from your provider's equipment arrives at one point. That point is where a router would plug in with no extra cable at all, and it may well be a corner of the flat that is a poor place to spread signal from.
We do not publish what your provider installs or where, so do not take this section as a promise about your flat. It is a checking step: walk the flat, find the point, and bring a photo of it to the site visit. If you are taking over a new flat, ask the provider's installer where it will connect before the walls are finished, not after.
Then decide one of two things:
- Keep the router at the entry point. It is the simplest answer. Make sure there is a power point beside it and that it will not be behind a closed cabinet door that stops air moving round it.
- Move the router to a better spot and run a cable to it. A router in the middle of the flat usually reaches the rooms better than one in a corner. The cable from the entry point to the new spot has to be planned in week 2, not threaded later.
Step two: choose the rooms that deserve a cable
Wi-Fi is fine for a phone on a sofa. It is a weaker choice for things that sit in one place all day, and a cable does not depend on how many walls there are between the router and the device. Give a wired data point to:
- The TV wall. A TV, a set-top box and a game console usually live together. One data point behind or beside the TV, planned with the TV console wall, saves a cable across the floor. Our TV console wall guide covers where the points, bracket and backing go.
- The desk you work at. If someone works from home, a data point at the desk is the one that matters most. Our study corner guide covers the desk, its sockets and light together.
- The main bedroom or a second room where a computer will stay. Only if one will.
- The router spot itself, if you moved it, so the cable from the entry point arrives where the router sits.
A room that will only ever have phones in it does not need a data point. Count the fixed devices you own today and the ones you are likely to add, and keep that list short. Every extra point is a $120 line on the quotation.
Step three: height and position
The data point is only useful if it is where the cable ends up. Three habits catch people out.
- Put it next to a power point. Every device that takes a data cable also takes power. A data point on one wall and the only socket on another means a cable and a plug lead across the room. On the calculator, a power point is a double 13A point at $90 each; place the data point beside one so that the router, the box or the computer plugs in without an extension lead.
- Match the point to the furniture. A data point at 300 mm from the floor behind a sofa is hard to reach. Behind a floating TV console it can sit just above the console, hidden. At a desk it belongs above the desktop, as the photo shows for the socket. Draw the furniture and the points on the same plan.
- Do not hide it behind something you cannot move. A point behind a fixed tall cabinet or a glued feature panel is a point you cannot use or repair. If it has to go behind carpentry, ask the carpenter to leave an access panel.
The ceiling: a place for an access point, if you want one
Some owners prefer to run a cable to a point in the false ceiling and mount a wireless access point there instead of a router on a shelf. It is a legitimate way to cover a long flat. It only works if the cable is laid before the ceiling is closed, which on our programme is weeks 4 to 5, and if the point is in a position you can reach later for servicing. Our false ceiling guide explains what a ceiling hides and where an access hatch is worth having.
If you might want a ceiling point, say so before the ceiling is drawn, and put it on the same drawing as the lights and the aircon trunking.
What goes in the quotation, and what to ask
A quotation can bury data points inside a lump sum. Ask for them as their own line.
- How many data points are included, and in which rooms?
- Are they priced separately from power points? On our calculator they are: $120 per data point, $90 per power point, $150 for an isolated power point for oven, hood or hob, and $250 per point for a 20A isolator for a water heater.
- Is the cable run from the entry point to the router spot included, and who lays it?
- Where will each point sit, in millimetres from the floor, and is it drawn against the furniture?
- If I change the position after the walls are closed, how is that priced?
Wiring changes in an HDB flat are done by a licensed contractor, and the electrical side is covered in our guide to electrical work and the licensed electrician. We do not publish a price for a full data wiring job beyond the per-point rate; any total for your flat depends on a site visit.
Checklist before the electrician starts
- Photograph where the provider's line enters the flat today.
- Decide whether the router stays there or moves, and mark the new spot if it moves.
- List the fixed devices: TV, box, console, desktop computer, printer.
- Mark a data point beside a power point at each of those, on the furniture drawing.
- Ask whether you want a ceiling point, and say so before the ceiling is drawn.
- Check the quotation shows data points as their own line at the published rate.
Ready to plan your points?
WhatsApp us on 9107 2601 with your flat type, your estate and the rooms where a computer or a TV will stay, and we will arrange a site visit to go through where the router goes, where each data point sits and what the carpenter must leave open. Any price depends on that visit. You can run the published electrical rates on the room cost calculator, see the published 4-room programme on the 4-room HDB renovation cost page, read how we work on our HDB renovation contractors page, and see more of this study corner in our project photos. We are an HDB Licensed Renovation Contractor, HB-09-5667H.
Related reading: study corner: points, aircon, light and desk depth · TV console wall: points, bracket and backing · false ceiling: what it hides · light switches and light points · electrical work and the licensed electrician · order of works · changing your mind mid-job