
Light Switches and Light Points in an HDB Flat in Singapore: Where Each Switch Goes Before the Ceiling Closes
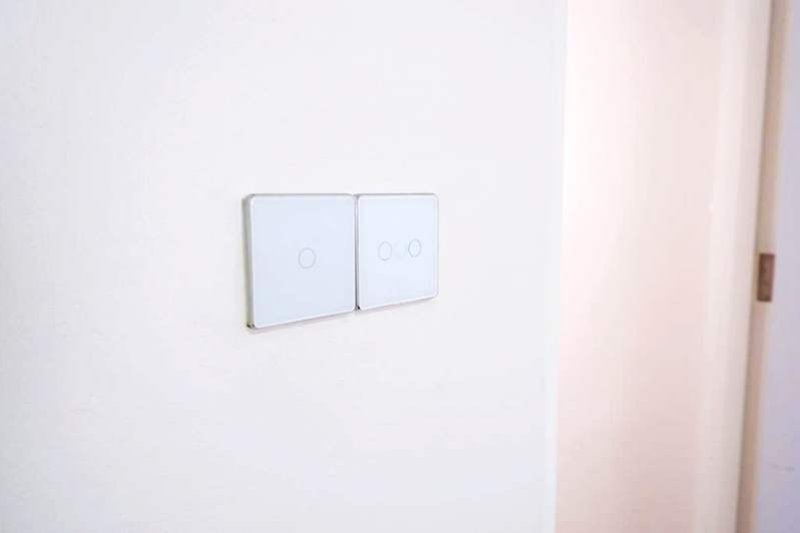
Pictured above: two white touch-panel switches side by side on a plain wall, from our project archive (C05). One has a single control and the other has two, so three separate jobs are controlled from one spot beside a door. A switch like this takes a minute to fit. Deciding what each of its controls does, and where the wire for it runs, is done weeks before.
Lights are the part of a renovation that owners notice every single day and plan the least. The electrician is told "downlights in the living room" and the quotation shows a number of points. Then the flat is finished, and the switch by the front door turns on every light at once, the bedroom needs a walk across the dark room to switch off, and the one light nobody wanted is the only one that works from the bed. None of this is bad workmanship. It is a plan that was never drawn.
This guide is for an HDB owner who is about to give an electrician the lighting. It uses only the rates and the programme already published on this site. It does not choose your fittings and it gives no price for your flat, because that depends on how many points your layout needs. What it covers is the part a contractor can walk you through: what a light point and a switch actually are, what to decide for each room, and what to put on the quotation and the drawing before the ceiling is closed.
The short answer
Draw the lighting on the floor plan before the electrician starts. For every light or group of lights, write down which switch controls it and where that switch sits. Give each job its own control, ask for two-way switching in any room with two doors or a long passage, decide whether anything must dim, and have the number of light points and switches written on the quotation as separate lines. The wire is simple to place in weeks 2 to 3 and awkward to move once the ceiling and the walls are finished.
A light point is not a light, and a switch is not a point
Three terms get mixed up on quotations, and mixing them is how owners end up paying for something different from what they pictured.
- A light point is a place where wiring is brought to feed a light. One downlight, one wall light or one ceiling light is usually one point. Our room cost calculator lists a light point at $90 each.
- The fitting is the light itself: the downlight, the pendant, the strip. The calculator's light point is the wiring position, so ask your electrician whether the fittings are included in a line, supplied by you, or priced separately.
- A switch is the control. Several light points can share one switch, and one light point can be controlled from two switches. The number of points and the number of switches are different numbers, so ask for both on the quotation.
The same calculator lists a power point at $90 each (a double 13A point) and a data point at $120 each. We do not publish a price for a switch or for a dimmer on its own, so those come after a site visit, and we have not put a figure on them here.
Step one: give each job its own control
The most common regret is a switch that does too much. Before you meet the electrician, write the jobs, not the fittings.
- The main light of the room. What you turn on when you walk in.
- The soft or mood light. Cove lighting, a strip, a wall light. It is the one you want without the glare of the main light.
- The task light. Over a desk, a vanity, a kitchen worktop. It should switch on by itself, not as part of the main light.
- The light for the night. The one you want on to reach the toilet without waking the household.
Each job that you want to control on its own needs its own wire from the switch to its lights, and its own control on the plate. A plate with three controls takes one position on the wall, so keeping the jobs separate does not mean more switches scattered around the room. It does mean deciding on the plan, before the wall is closed, which lights belong to which job.
Step two: put the switch where your hand goes
The position of a switch becomes a habit in the first week you live in the flat. Walk each room on the floor plan with your finger.
- Inside the door, on the handle side. Your hand reaches for the wall next to the handle as you come in. A switch behind the opened door is a switch you search for.
- Which way does the door open? The switch has to be on the side the door does not cover. Decide the door swing and the switch position together, and if you are replacing the doors, our post on replacing the door or the frame too covers the choices.
- At the bed. A switch you can reach from the bed, for the main light or for the night light, is something many people want. It also cannot be added later without opening the wall beside the bed.
- Beside the sofa or the dining table. If the feature light and the main light are far from the seat, decide whether one control should be within reach of it.
- At the entrance. One control that switches off the lights you forgot is possible only if the lights are planned that way. Ask what can be done, and what it will add to the quotation.
Step three: two doors, two switches
A room with two entrances, a long passage, or a bedroom with a bathroom at the far end is a place where one switch is not enough. The solution is a two-way arrangement: the same light is controlled from two switches, so you can turn it on at one end and off at the other.
It has to be built into the wiring from the start. The two switches are joined by an extra run of wire inside the wall, so the position of the second switch is decided while the wall is open. When you mark the plan, ask yourself for each light: where do I want to turn this on, and where do I want to turn it off? If the two answers are different places, say so on the drawing. Ask your electrician to list the two-way positions as separate lines on the quotation, with how many there are.
Step four: what has to dim
A dimmer is a good answer for a room that has to do two jobs, such as a living room used for the day and for the evening. It is also a decision that has to match the fitting, because not every light dims. Before the fittings are bought:
- Choose which lights you want to dim, and tell the electrician. It is easier to decide it on the plan than to change a switch later.
- Ask whether the lights you have chosen are meant for dimming and which dimmer is suitable, because the light and the dimmer have to work as a pair. We do not publish a price for a dimmer, so it comes after a site visit.
- If you only want a softer light at night, a second control for a low light can do the job without depending on a dimming pair.
Step five: the ceiling, the cove and what is hidden
Lighting and the ceiling are decided together, because the wires run in the ceiling space and the false ceiling closes it. Our 4-room cost page puts a gypsum false ceiling with cove lighting at $5 to $10 per square foot. That is the published figure for the ceiling and the cove, and the number of light points and switches on top of it comes from your layout.
- Positions before the board. The openings for downlights are cut in the ceiling, so the positions must be settled before the ceiling boards are fixed. Mark them on the plan and, if you can, in the room itself.
- Access. Ask what happens when a light or a transformer needs to be changed. A hidden part with no way to reach it is a job that costs more than it should in a few years. Our post on what a false ceiling hides and when to skip it goes through this.
- The cove. A cove light is a strip in a recess. Decide whether it is on its own control, because it is usually the light you use most in the evening.
- Without a false ceiling. A flat that keeps its bare ceiling takes surface lights or wall lights, and the wiring comes from the switch to the point along a route that is decided on the plan. Ask the electrician to show the route.
Where it sits in the programme
On our published 4-room programme, a full renovation runs like this.
- Week 1: hacking and demolition.
- Weeks 2 to 3: masonry, plumbing and electrical. The programme describes the electrical work in this stage as full rewiring. The light points, the switches and the two-way runs go in here.
- Weeks 4 to 5: waterproofing, tiling and ceiling. The false ceiling is closed in this stage, so the downlight positions and the cove are decided before it.
- Weeks 6 to 7: carpentry installation.
- Week 8: painting, doors and hardware, deep cleaning and handover walkthrough.
Three things follow. First, the lighting plan has to be finished before week 2, because a switch moved after the wall is plastered is a job of its own. Second, the electrician needs the carpentry drawings, because a light inside a wardrobe or under a cabinet is wired at this stage even though the cabinet arrives in weeks 6 to 7, which is the same logic as in our post on the order of works. Third, a change after the plan is signed is a variation, which our guide to variation orders explains. If you are building a desk or a work corner, the points and light for it are worked through in our post on the work-from-home study corner.
The wiring itself is done by or under a licensed electrical worker, as we explain in our post on electrical work and the licensed electrical worker.
Questions to put on the quotation and the drawing
- How many light points are in each room, and are they listed as separate lines?
- How many switches and how many controls on each plate, and which job does each control do?
- Which lights are two-way, and where are the two switches?
- Which lights are meant to dim, and which dimmer is matched to them?
- Are the fittings included, supplied by me, or priced separately?
- At what height and on which side of each door does each switch sit?
- Where is the switch I can reach from the bed?
- Will I get a photograph of the walls and the ceiling space before they are closed, and a layout showing the switches as installed?
What to do this week
- Get a floor plan of your flat and mark every room with the jobs its lights should do: main, mood, task and night.
- For each room, draw the door swing and put a cross where your hand will go to switch on the main light.
- Circle any room with two doors or a long passage and write "two-way".
- Decide which lights you want to dim, and ask the shop whether the fittings you like are meant for dimming.
- Take the plan to your contractor before first fix and ask for the light points, switches and two-way positions to be listed as separate lines, then photograph the ceiling space and the walls before they are closed.
We are an HDB Licensed Renovation Contractor, HB-09-5667H. Planning the lights? WhatsApp us on 9107 2601 with your flat type, your estate and the rooms where lighting matters most, and we will arrange a site visit to go through the points and switches with you. Any price depends on that visit. The published programme and figures are on our 4-room HDB renovation cost page, you can run the published electrical rates on the room cost calculator, and our other services are on the HDB renovation contractors page.
Related reading: electrical work and the licensed electrical worker · false ceiling: what it hides · work-from-home study corner