
New Condo in Singapore: Report Defects Before You Renovate, Not After
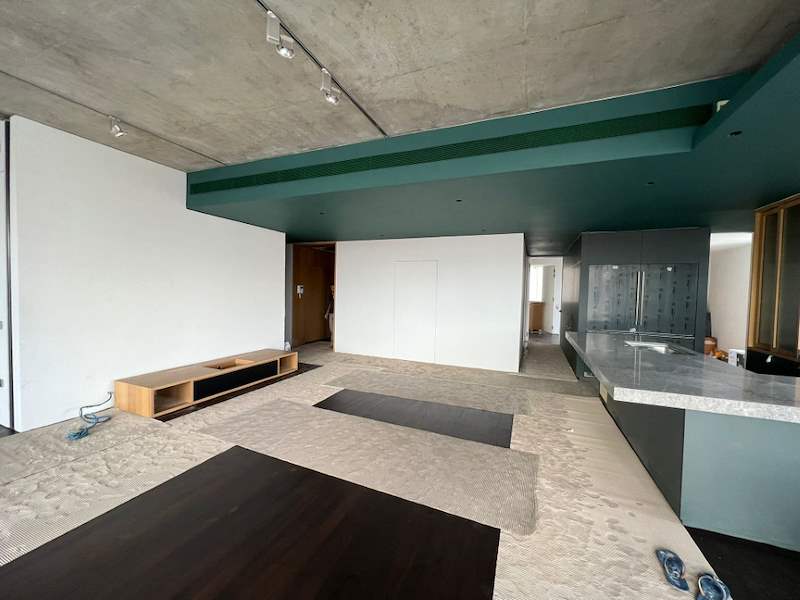
The keys are in your hand, the renovation contractor is booked, and the natural instinct is to start the moment the management office says yes. In a brand-new condo that instinct can cost real money, because the first job in a new unit is not hacking or carpentry. It is getting the developer to fix what the developer built wrong, while it is still the developer's problem.
What the defects liability period actually gives you
URA's guidance for buyers of new private homes is short. Once the Temporary Occupation Permit (TOP) is issued and you have paid the progress payment due on TOP, the developer tells you how to collect your key. After that, you can inspect the unit and report defects in your unit and in the housing project to the developer, for rectification within the one-year defects liability period. The developer rectifies reported defects at its own cost.
Two details matter more than the headline:
- The clock is set by your sale and purchase agreement, not by the day you walk in. Read the defects clause in your S&PA for the exact start date. It is not necessarily the day you pick up the keys, and if you collected them late, part of your year may already be gone.
- There is a fallback if the developer does not act. URA explains that if the developer fails to rectify the defects within the specified time, you may rectify them and instruct the Singapore Academy of Law to withhold the sum it holds as stakeholder for the developer, by following the procedures set out in the S&PA. That is a paper process. Follow it to the letter and keep copies of everything.
Why starting the renovation first gives that protection away
A defects claim only works while the defect can be seen and is clearly the developer's. Renovation works attack both.
- Covered defects cannot be inspected. A crack behind a new wardrobe, a hollow tile under a new floor finish, a chipped wall tile behind a vanity: once carpentry or a new surface goes over it, nobody from the developer's side is coming to look.
- Hacked defects no longer exist. If your contractor hacks out bathroom wall tiles that were badly laid, the problem is gone, and so is anything left for the developer to rectify. You have paid to remove it.
- Every new problem has two suspects. Once a contractor has worked in a unit, a crack, a stain or a sticking door can be blamed on the renovation. Without a record of the unit before works started, it becomes your word against the developer's.
- Your contractor's warranty will not step in. Our own published warranty says it plainly: standard renovation workmanship carries a 12-month warranty from handover, it covers defects in what we built, and rectification of existing work we did not carry out is quoted separately. No honest contractor warrants somebody else's work. While the defects liability period runs, the developer is the right party to fix the developer's work, at no cost to you.
Use the waiting time you already have
A condo renovation cannot start the day you collect keys anyway. Your condo's management has to approve the renovation first, and as our condo renovation page says, that approval typically adds 1–2 weeks at the start. That gap is where the defects check belongs.
- Key collection week: inspect the whole unit, photograph everything, and submit the defects list the way the developer asks for it.
- While the renovation application is with management: the developer's rectification works happen. Your contractor can measure up and plan, but should not start.
- Before works start: re-inspect every rectified item and confirm in writing what is closed and what is still outstanding.
- Then start the renovation, with a dated record of the unit's condition on day one (more on that below).
What to check first: everything your renovation will cover
A full inspection covers the whole unit. When a renovation is planned, look hardest at what is about to disappear from view.
- Floors that will get a new finish or built-in furniture. Tap the tiles lightly with a coin or the back of a key and listen for a hollow sound, especially along walls and doorways where cabinets will sit. Our note on popped and hollow floor tiles explains what that sound means.
- Walls and ceilings behind future carpentry. Cracks, uneven plaster, stains and patchy paint. Walk the unit with your layout plan and inspect every wall that a wardrobe, TV console or kitchen cabinet will hide.
- Bathrooms and the kitchen. Run every tap and shower and flush every WC. Watch whether water on the floor actually runs to the floor trap instead of sitting. Look for cracked or chipped tiles, loose fittings, and any staining on the ceiling.
- Windows, sliding doors and the balcony. Open, close and lock every one. Look at the frames and seals, and check again after heavy rain for water marks. Check that the balcony drains.
- Electrical points. Test every socket with a simple plug-in tester and try every switch. If your renovation adds or moves points, a dead socket is far easier to report as a defect before your electrician has worked on the wiring.
- Doors, locks and anything the developer supplied, such as kitchen cabinets, appliances or wardrobes. Test each one, not a sample.
How to report so it actually gets fixed
- Use the developer's own process. Developers set out how they want defects reported, usually on their own form. Use it, and keep a copy of every submission with the date.
- One numbered list, with a photo for each item, naming the room and the exact spot. "Master bedroom, wall behind the door, crack at switch height" gets fixed. "Cracks in bedroom" gets argued about.
- Re-inspect after rectification. A patched crack or a relaid tile is new work, and it deserves the same check.
- Keep reporting through the year. The period is a year, not a single inspection. Things that only appear with use, like a water mark after a storm, still belong on the list.
"I am hacking that bathroom anyway." Report it regardless
It is a fair question: why report a cracked tile in a bathroom that is being redone next month? There are two good reasons to put it on the list anyway.
- It creates the record. A dated list of what was wrong at key collection is the evidence of what the developer handed over. If a leak or crack appears later, in your unit or in the one below, that record is what separates the developer's problem from your renovation's.
- A loose or cracked tile is a symptom, not a diagnosis. Let the developer look at it before your contractor removes the evidence.
Then settle each of these items with the developer in writing: rectified, or accepted as it is because you are replacing it. What you should not do is hack it out without telling anyone.
Plan the renovation around the building, not just the defects
A new unit tempts people into bigger changes. Check three things before anything permanent is designed:
- Get the approved plans. URA advises buyers to get a copy of the approved plans, which it supplies through a DC15 requisition of planning records. Designing around what the plans actually show avoids a surprise halfway through hacking.
- Walls need two approvals, not one. Hacking a wall in a condo needs your MCST's approval, and a BCA structural assessment if structural elements are involved. Most condos allow non-structural hacking with proper permits, but some restrict it heavily. Check your condo's rules before you fall in love with a layout that removes a wall.
- Adding floor area needs planning permission. URA's guidance is that alterations or additions to a private home generally require planning permission if they increase the gross floor area.
Wet areas deserve one more line. If your renovation replaces a bathroom floor or its waterproofing, the developer's work there is gone and your contractor's takes its place. On our own jobs, every wet area gets a waterproofing membrane and a 24-hour ponding test before tiling. Ask every contractor you are comparing whether theirs does.
Record the unit, and the common areas, before day one
On the morning works start, walk the unit with your contractor and take a dated video of every room, then do the same for the lift lobby, corridor and lift your contractor's workers and materials will use. A condo renovation permit usually involves a deposit lodged with management, and our guide to condo renovation rules and MCST approval covers getting that deposit back. A before-record protects the deposit, protects you if a neighbour raises damage, and closes the defects question too: anything that is on neither the defects list nor the video is much harder for anyone to argue about later.
Timing and budget
For planning, our condo renovation page publishes a typical condo renovation time of 8–12 weeks, with smaller 1–2 bedroom units completing in 6–8 weeks. It gives $25,000–$60,000 for a comprehensive 1–2 bedroom condo renovation and $40,000–$90,000 for a 3-bedroom, depending on scope and materials. Final pricing needs a site survey of the unit's actual condition, which in a new condo includes whatever is still on the defects list.
Before your contractor starts: a checklist
- Do I know the exact start date of my defects liability period from the S&PA?
- Have I inspected every floor, wall and fitting that the renovation will cover or remove?
- Has my defects list gone in through the developer's own process, numbered, with photos?
- Have the rectified items been re-inspected, and is what is still outstanding in writing?
- For defects in areas I am replacing anyway, is there a written decision with the developer?
- Do I have the approved plans, and has management approved the renovation, including any hacking?
- Is there a dated video of the unit and the common areas before works begin?
Related reading
For the approval side, start with condo renovation rules and the MCST approval process. When your own renovation is finished, the same discipline applies again at the handover inspection before your final payment. And if water ever shows up on a ceiling, ceiling leaks from the unit above explains how responsibility works in a condo.
If you have new keys, or a key collection date, and want the renovation planned around the defects check, WhatsApp us on 9107 2601 with your key collection date and floor plan. We will tell you honestly what to look at before any work starts and how the renovation fits around the approval. Larry Contractors is an HDB Licensed Renovation Contractor, HB-09-5667H; you can read how we work on our condo renovation and direct contractor pages.