
Feature Wall Ideas for HDB and Condo Living Rooms
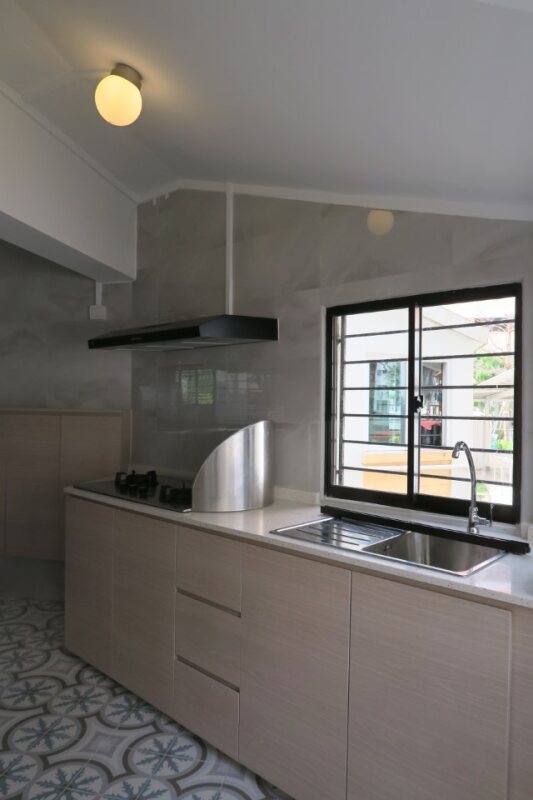
A feature wall in your HDB or condo living room costs between $800-$8,000 depending on material and size. Popular options include fluted timber panels ($80-$150/sqm), sintered stone ($250-$400/sqm), and decorative paint ($800-$1,500 flat). Most installations take 2-5 days. For HDB flats, you don't need HDB approval for non-structural feature walls, but avoid drilling into structural columns. Here's what works in Singapore homes and what you'll actually pay.
Feature Wall Material Options and Costs
The material you choose drives both aesthetics and budget. We've installed hundreds of feature walls across Singapore HDB flats and condos since 2009, and these are the options that deliver the best value and durability in our climate.
Timber and Veneer Solutions
Fluted timber panels remain the most requested feature wall treatment in 2024. These vertical grooved panels add texture and warmth without overwhelming small HDB spaces. We fabricate custom panels at our Kaki Bukit carpentry factory using moisture-resistant MDF core with oak, walnut, or ash veneer. Cost: $80-$150/sqm installed, depending on veneer grade. A typical 3-metre-wide feature wall runs $1,200-$2,200 including backing structure and LED strip lighting in the grooves.
Solid timber slat walls offer a premium alternative. We use 20mm-thick engineered timber slats with 30-40mm spacing, mounted on concealed aluminium tracks. More expensive at $180-$280/sqm, but the depth and shadow play justifies the cost in larger condo living rooms with 3-metre ceilings. Installation takes 3-4 days including staining and sealing.
Wood-look laminates are the budget option: $35-$60/sqm for material, plus $25-$35/sqm installation. They photograph well but lack the tactile quality of real timber. We recommend them for rental properties or if you're planning to change the look in 3-5 years.
Stone and Sintered Surface Options
Sintered stone has replaced natural marble as the premium choice for feature walls. Brands like Dekton and Neolith offer 12mm slabs in marble-look, concrete, and terrazzo finishes that won't stain or etch like natural stone. Cost: $250-$400/sqm installed for standard patterns, $450-$600/sqm for book-matched feature slabs. A 3-metre feature wall averages $3,800-$5,500.
Natural marble still appears in luxury condo projects, particularly book-matched Calacatta or Statuario. Budget $350-$600/sqm for material plus $150-$200/sqm installation. Requires annual sealing and will show water marks if placed near aircon condensation points—common in Singapore living rooms with wall-mounted units.
Quartz slabs offer a middle ground: $180-$280/sqm installed. More stain-resistant than marble, less expensive than sintered stone, but the patterns can look repetitive across large surfaces. Works well for smaller accent sections behind TV consoles.
Paint and Wallcovering Techniques
Textured paint finishes deliver impact at minimal cost. We use techniques like micro-cement effect ($800-$1,500 for a standard living room wall), ombre gradients ($600-$1,000), or geometric colour-blocking ($500-$800). The key is proper surface preparation—we strip old paint, fill all cracks, and apply primer before the decorative layers. Total timeline: 3-4 days including drying time.
Peel-and-stick wallpaper has improved dramatically. Current vinyl and non-woven options last 5-7 years in aircon environments without peeling. Cost: $8-$25/sqm for material, plus $12-$18/sqm installation if you want guaranteed bubble-free results. We install 20-30 sqm in one day. Choose moisture-resistant backing for walls near windows or external walls prone to condensation.
Traditional wallpaper remains relevant for high-end projects: $35-$150/sqm for designer prints, plus $15-$25/sqm installation. Requires perfectly smooth walls and controlled humidity—not ideal for non-aircon HDB flats.
Metal and Industrial Finishes
Perforated metal panels create modern, industrial looks popular in open-concept condo layouts. We fabricate custom aluminium panels with laser-cut patterns at $220-$350/sqm installed. Add backlit LED strips for drama: additional $180-$280 for wiring and RGB controls. Installation takes 2-3 days.
Mirrored bronze or smoked glass panels expand tight HDB living rooms visually. Cost: $150-$250/sqm for 6mm toughened glass with safety backing. Must be installed on perfectly flat substrates—we typically build a plywood backing structure first, adding $40-$60/sqm to the total.
| Material Type | Cost Range (SGD/sqm) | Lifespan (Years) | Installation Time | Best For |
|---|---|---|---|---|
| Fluted timber panels | $80-$150 | 10-15 | 3-4 days | HDB and condo, Japandi/Scandi styles |
| Sintered stone | $250-$400 | 20+ | 4-5 days | Luxury condos, high-traffic areas |
| Textured paint | $20-$40 | 5-8 | 3-4 days | Budget-conscious, easy future changes |
| Natural marble | $500-$800 | 15-20 | 5-6 days | Luxury condos, statement walls |
| Peel-and-stick wallpaper | $20-$43 | 5-7 | 1-2 days | Rental units, temporary designs |
| Perforated metal | $220-$350 | 15+ | 2-3 days | Industrial/modern condos |
Design Strategies for HDB Versus Condo Living Rooms
HDB and condo living rooms present different spatial and structural constraints. What works in a 35-sqm condo living room can overwhelm a 16-sqm 4-room HDB space.
HDB-Specific Considerations
Most HDB living rooms measure 3.2-4.5 metres wide by 3.5-5 metres long. In these proportions, feature walls work best on the longest wall, typically where the TV console sits. Keep the feature wall lighter than surrounding walls to avoid closing in the space—we see many homeowners choose dark walnut panels that make compact rooms feel cave-like.
HDB ceiling heights max out at 2.6-2.7 metres (2.4 metres after false ceiling). Vertical elements like fluted panels or slim vertical slats draw the eye upward and create an illusion of height. Avoid horizontal banding or wide horizontal planks—they emphasise the low ceiling.
Structural columns are non-negotiable in HDB flats. You cannot drill into or clad columns without HDB approval, which they rarely grant. Instead, work around columns: stop the feature wall 50mm before the column edge, or use the column as a natural boundary between the feature wall and adjacent wall. We've designed dozens of feature walls that incorporate columns as intentional dividers.
Bomb shelter walls offer opportunities. Since you cannot hack these walls, cladding them with a feature wall treatment makes functional sense. The typical bomb shelter wall in 4-room and 5-room flats is 2.4-3 metres wide—ideal proportions for a feature wall behind a sofa or media console.
Condo Design Opportunities
Condo living rooms average 25-40 sqm with 2.8-3.2-metre ceilings (some luxury developments offer 3.5-metre ceilings). This extra height and width allows bolder treatments: floor-to-ceiling stone slabs, large-format sintered stone panels, or dramatic colour contrasts.
Open-concept layouts in condos mean the feature wall becomes visible from dining and kitchen areas. Design it as a multi-angle element. We often extend the feature wall material around corners or onto the ceiling soffit to create continuity. Budget an additional 20-30% material for wraparound effects.
Condo MCST permits are required if your feature wall involves drilling into external walls or affects waterproofing. This mainly applies if you're mounting heavy stone on perimeter walls. Submit your proposal with structural engineer endorsement—turnaround is typically 2-4 weeks. We handle MCST submissions as part of our project management.
Proportion and Placement Rules
The feature wall should occupy 30-60% of the total wall surface in view. In a 4-metre-wide living room, a 2-2.5-metre feature wall hits the sweet spot. Anything narrower looks tentative; wider overwhelms.
Height matters as much as width. Full-height feature walls (floor to ceiling) create drama but work only in rooms with balanced proportions. In long, narrow HDB living rooms, stop the feature wall at 2-2.2 metres high and cap it with a trim or lighting cove—this horizontal break widens the visual field.
Position feature walls opposite the main entry point to the living room. When you walk from the dining area or front door into the living space, the feature wall should be the focal point. Placing it on the entry wall wastes its impact—you'd only see it when leaving the room.
Installation Process and Timeline
Feature wall installation sequences vary by material, but all follow similar preparation steps that determine the final quality.
Pre-Installation Requirements
Wall assessment comes first. We check for levelness with a 2-metre straight edge—most HDB and condo walls have 5-10mm deviation over 3 metres. Anything beyond 8mm requires correction. For tile or stone feature walls, we apply self-leveling compound (adds 1 day and $200-$400). For timber cladding, we install a leveling batten structure (adds 1 day and $300-$500).
Electrical rough-in must happen before feature wall installation. If you want concealed wiring for wall-mounted TVs, LED strips, or wall sconces, we chase the cables into the wall or run them through the backing structure. Add 1 day and $250-$400 per drop point for licensed electrician work.
Existing wall treatments require removal. We strip old wallpaper, scrape off loose paint, and fill holes. If the wall has existing tiles, we can tile-over-tile for stone feature walls (saves cost) or hack off tiles if installing timber or wallpaper (adds 1 day, $200-$350 including disposal). Hacking generates dust—we seal off adjacent rooms with plastic sheeting and run air scrubbers.
Installation Sequence by Material
Timber panel installation (3-4 days):
- Day 1: Install backing structure—18mm plywood sheets on 400mm-spaced battens, secured to masonry with chemical anchors
- Day 2: Fabricate and stain panels at our factory; panels arrive site-ready
- Day 3: Install panels with concealed clips or adhesive, leaving 2-3mm expansion gaps; route channels for LED strips if specified
- Day 4: Install LED strips, wire controls, apply edge trim, final sealing
Sintered stone installation (4-5 days):
- Day 1: Template wall dimensions, order slabs with 10mm tolerance
- Day 2: Slabs delivered; dry-fit on-site to confirm cuts
- Day 3-4: Apply tile adhesive and install slabs with mechanical anchors for panels over 1.5 sqm; large slabs require two installers
- Day 5: Grout joints (if any), polish surface, seal edges
Paint finish installation (3-4 days):
- Day 1: Surface prep—fill cracks, sand smooth, prime
- Day 2: Base coat application; drying time 4-6 hours between coats
- Day 3: Decorative texture or pattern layers using sponges, trowels, or stencils
- Day 4: Protective topcoat; full cure time 24-48 hours
Weather affects timelines. During monsoon season (November-January), humidity slows paint and adhesive curing by 20-30%. We schedule stone and timber installations during wet months and save paint-intensive work for dry periods.
Post-Installation Requirements
Ventilation is critical for the first 48 hours after installation. New timber, paint, and adhesives off-gas VOCs. Run aircon and open windows intermittently to circulate air. Don't mount TVs or artwork until adhesives fully cure—typically 72 hours for timber, 5-7 days for stone.
Final cleaning removes construction dust and adhesive residue. We vacuum all surfaces, wipe down panels with microfiber cloths, and clean adjacent flooring. For stone surfaces, we apply initial sealer coats—reapply annually for natural stone, unnecessary for sintered stone.
Common Mistakes and How to Avoid Them
We've remedied dozens of poorly executed feature walls. These errors account for 80% of callbacks and homeowner dissatisfaction.
Proportion Errors
The most frequent mistake: feature walls that are too narrow. A 1-metre-wide strip of decorative tile behind a 2-metre TV console looks like an afterthought. If you're centering the feature wall behind furniture, it should extend 300-500mm beyond the furniture edges on each side. A 1800mm TV console needs a 2400-2800mm feature wall minimum.
Conversely, wrapping all four living room walls in the same decorative treatment dilutes the "feature" concept. The point is contrast. One wall gets the statement material; the other three use complementary paint or neutral finishes. We've seen homeowners install fluted panels on all walls, spending $8,000-$12,000 for a result that feels busy and hotel-like.
Material Selection Mismatches
Dark timber in small HDB rooms is the classic error. Walnut and wenge panels absorb light and shrink perceived space. In HDB 4-room or 3-room flats, stick with light oak, ash, or whitewashed timber. Save dark woods for condo living rooms over 25 sqm with ample natural light.
High-gloss finishes on feature walls opposite windows create glare. We've replaced multiple glossy sintered stone and laminate feature walls because they reflect afternoon sun directly into seating areas. Use matte or honed finishes for walls facing east or west windows.
Mixing too many textures backfires. A fluted timber feature wall pairs well with plain painted walls, not with textured wallpaper or exposed brick on adjacent walls. Limit the living room to two material textures: one on the feature wall, one on the floor, and keep walls and ceiling simple.
Structural and Practical Oversights
Inadequate backing structure causes sagging. Timber slat walls need 18mm plywood backing at minimum, secured at 400mm intervals. We've repaired installations where contractors used only horizontal battens—the panels bowed within six months. Stone slabs over 1.5 sqm require mechanical anchors, not just adhesive.
Ignoring cable management ruins clean aesthetics. Homeowners often install feature walls, then realize they need to run HDMI, power, and network cables for wall-mounted TVs. Surface-mounted conduits look terrible. We embed PVC conduit in the backing structure during installation—costs an extra $150-$250 but saves the finished look.
Failing to plan for future changes locks you in. Sintered stone and tile feature walls are permanent—removal costs $800-$1,500 and damages the underlying wall. If you're renovating a BTO and think your tastes might evolve, choose reversible treatments: peel-and-stick wallpaper, paint, or mechanically fastened timber panels that unclip without damage.
Lighting Integration for Maximum Impact
Lighting transforms feature walls from decorative to dramatic. The material and lighting design should be planned together, not as an afterthought.
LED Strip Lighting Techniques
Recessed LED strips in fluted timber grooves create shadow lines that emphasize texture. We route 10mm-wide channels vertically through every third or fourth groove, install IP20-rated LED strips (3000K warm white or RGB for colour-changing effects), and cover with frosted acrylic diffusers. Cost: $180-$280 per 3-metre wall including transformer and controls.
Top-down LED coves wash light over textured surfaces. We install a 50-80mm cove at ceiling height with recessed LED strips angled 30-45 degrees downward. This works beautifully with stone, concrete-effect paint, or 3D wall panels. The grazing light accentuates surface relief. Cost: $220-$350 per linear metre including carpentry and electrical.
Bottom-up LED strips at skirting level create floating effects. Particularly effective with dark feature walls—the light lifts the wall visually and reduces its visual weight. We build a 20-30mm gap between the feature wall and floor, install waterproof LED strips, and cover with a shadow gap trim. Cost: $150-$250 per 3-metre wall.
Spotlight and Track Lighting
Track lighting offers flexibility for renters or homeowners who want adjustable focus. We mount brushed nickel or black tracks 1-1.5 metres from the feature wall with adjustable LED spotlights (10W, 3000K). Position three spots for a 3-metre wall, spaced evenly. Cost: $350-$550 including track and fixtures.
Recessed wall washers in the ceiling provide uniform illumination without visible fixtures. We install 12W LED downlights with asymmetric reflectors that throw light sideways onto the feature wall. Requires false ceiling with 150mm depth minimum. Cost: $120-$180 per downlight installed.
Smart Lighting Controls
RGB LED strips with smartphone control add versatility. We install systems compatible with Google Home or Apple HomeKit—change colours to match mood, dim for movie nights, or set schedules. Adds $100-$200 to standard LED installation.
Separate circuit control for feature wall lighting lets you create ambient scenes without turning on main living room lights. We wire feature wall lights to a dedicated switch or dimmer—essential for evening entertaining. Licensed electrician work: $150-$250 per circuit.
Maintenance and Longevity Considerations
Feature walls should last 10-15 years with minimal maintenance. Material choice and installation quality determine durability in Singapore's humid, air-conditioned environments.
Timber and Veneer Care
Dust weekly with a dry microfiber cloth—avoid water on timber surfaces. Aircon condensation near wall-mounted units can cause veneer bubbling; maintain 0.5-1 metre clearance between aircon units and timber feature walls. If panels are near windows, apply UV-resistant topcoat during installation to prevent fading ($80-$120 additional).
Inspect expansion gaps annually. Singapore's humidity fluctuates 60-90%, causing timber to expand and contract. The 2-3mm gaps we leave between panels absorb this movement. If gaps close fully, panels can buckle—contact us for assessment.
Stone and Sintered Surface Care
Wipe sintered stone with damp cloth and pH-neutral cleaner—no sealing required. Natural marble needs annual resealing: $150-$250 per wall for professional application. Check for cracks around mechanical anchors every 2-3 years, especially in high-rise condos subject to building movement.
Paint and Wallpaper Maintenance
Textured paint finishes accumulate dust in crevices. Vacuum with soft brush attachment every 2-3 months. Touch-ups are challenging—textured finishes require reapplication to the entire wall for consistent appearance, not spot repairs.
Wallpaper edges can lift in high-humidity rooms. Check corners and seams every six months; re-glue immediately if peeling starts. Use PVA adhesive for vinyl wallpaper, paste-the-wall adhesive for non-woven types.
Frequently Asked Questions
Do I need HDB approval for a feature wall in my HDB flat?
No HDB approval is required for non-structural feature walls that don't involve hacking, drilling structural elements, or affecting the building's exterior. You can install timber panels, stone cladding, paint, or wallpaper freely. However, if you plan to hack tiles, remove walls, or drill into columns, you need HDB's prior approval. Submit your renovation proposal through the HDB renovation portal at least one week before work begins. Non-structural feature walls are categorised as Category 3 works—no permit needed, but inform HDB of your renovation dates.
How much does a feature wall cost for a typical HDB 4-room flat?
A standard 3-metre-wide by 2.6-metre-high feature wall in an HDB 4-room flat costs $1,200-$3,500 depending on material. Budget options like textured paint or peel-and-stick wallpaper run $800-$1,200. Mid-range fluted timber panels cost $1,500-$2,500. Premium sintered stone or marble slabs range $3,500-$5,500. These prices include materials, installation, backing structure, and basic LED lighting. Add 20-30% if you want full-height installations or complex lighting integration with smart controls.
Can I install a feature wall in a rental condo without MCST approval?
You can install removable feature wall treatments—peel-and-stick wallpaper, freestanding timber slat panels, or paint—without MCST approval since they're interior cosmetic changes. However, drilling into external walls, installing heavy stone that requires structural anchors, or running new electrical points may require MCST permits depending on your condo's by-laws. Check your lease agreement and MCST regulations before starting. As a renter, get written landlord approval for any permanent installations. We recommend reversible solutions like peel-and-stick materials or mechanically fastened panels that uninstall cleanly.
Which feature wall material works best in Singapore's humid climate?
Sintered stone and moisture-resistant timber panels perform best in Singapore's 70-90% humidity environment. Sintered stone is completely impervious to moisture, stains, and temperature changes—ideal for living rooms with floor-to-ceiling windows that experience temperature swings. For timber, we use engineered veneer over MDF with moisture-resistant core and sealed edges. Avoid solid timber unless your living room is air-conditioned 24/7; uncontrolled humidity causes warping. Natural materials like fabric-backed wallpaper and unsealed wood show mold growth within 1-2 years in non-aircon HDB flats.
How long does feature wall installation take, and will it disrupt my home?
Most feature wall installations take 2-5 days depending on material complexity. Paint and wallpaper are fastest (2-3 days), timber panels take 3-4 days, and stone installations need 4-5 days for templating, cutting, and installation. Disruption is confined to the living room area—we seal off the workspace with plastic barriers to contain dust and noise. Hacking existing tiles or creating electrical chases adds 1-2 days and generates more dust. We schedule noisy work (drilling, cutting) between 9am-5pm on weekdays to comply with NEA noise regulations. You can stay in your home during installation; most homeowners vacate the living room and use bedrooms as temporary living space.
Transform Your Living Room with Larry Contractors
We've installed over 500 feature walls across Singapore HDB flats and condos since 2009, from budget-friendly textured paint to statement marble slabs. Our carpentry factory at 19 Kaki Bukit Industrial Terrace fabricates custom timber panels to your exact specifications—no middleman markups, no subcontractor delays. Every project includes a fixed-price quotation with material breakdowns, a dedicated project manager, and post-installation support. Licensed HDB contractor (HB-09-5667H) and BCA-registered (GB2), we handle permit submissions and ensure code compliance. Ready to create your feature wall? Message us on WhatsApp at https://wa.me/6591072601 with your living room photos and dimensions for a detailed quote within 24 hours.